When it comes to selecting a commercial roof membrane, self-adhering EPDM stands out for its ease of installation, reduced environmental impact and durability. However, installing a self-adhering EPDM roof system requires careful planning and execution to ensure a successful and cost-efficient application.
As a roofing contractor, you can achieve a high-quality self-adhering EPDM roof system installation that meets or exceeds your client’s expectations by following a few tips and best practices.
Surface preparation
Although I will focus on self-adhering membrane application, any roof system installation should include ensuring the structural deck is sound with positive slope to promote proper water drainage. The immediate substrate for an EPDM membrane—usually at least one layer of roof insulation attached with mechanical fasteners and insulation plates—also should be installed before membrane application. Contact the membrane manufacturer for information about flashing accessories and roof termination options.
Proper surface preparation is crucial before installing a self-adhering EPDM membrane. It is vital a roof substrate be clean; dry; and free of dust, dirt or other contaminants. This will set the foundation for a high-performing, long-lasting roof. Do not install a self-adhering roof system if there is dew, frost or any precipitation on the roof deck surface or when rain is expected because moisture will compromise the effectiveness of the installation and create hazardous working conditions.
Tools
In terms of tools and equipment, installing a self-adhering EPDM membrane requires a push broom and weighted roller. Unlike other roof systems, installing an EPDM roof system does not require hot-air welders or generators.
Utility knives and roofing scissors also are necessary for sizing and trimming the membrane around vents, pipes and other rooftop projections. A caulking gun, handheld seam roller, and scrub pads or paint brushes are needed for seams, flashings and detail work.
Temperature considerations
Weather is a major factor when successfully installing any roof system. Generally, self-adhering EPDM roof membranes can be installed when ambient and surface temperatures are between 40-120 F though some manufacturers’ self-adhering membranes can be installed at temperatures as cold as 20 F. Temperatures below 40 F are considered “cold weather” and require additional precautions. Be sure to follow the instructions on the product label and other literature provided by the manufacturer.
Remember, single-ply membranes become more rigid in cool temperatures and more pliable in warm temperatures, which affects their workability. Additionally, primers and sealants may not bond well in cold temperatures.
Installation
I have grouped the main aspects of successful EPDM membrane installation into what I call the four R’s.
Relax: The first step is to unroll the EPDM membrane and let it relax topside up before installation. This process enables the membrane to absorb heat and release tension from the manufacturing, packaging and shipping processes. Let the membrane “normalize” for at least 30 minutes (or up to an hour in cold weather or overcast conditions).
Reposition: Next, reposition the EPDM membrane in place. This involves aligning the membrane and using chalk lines to ensure everything is straight before removing the release liner. Be sure to position the membrane so water flows over the seams toward drains or gutter edges. Fold back the leading edge of the membrane 5 to 6 feet at one end to expose the release liner without disturbing the membrane position. Never fold the membrane in half lengthwise to remove the release liner. Doing so could potentially cause a permanent crease in the membrane that would result in a large wrinkle.
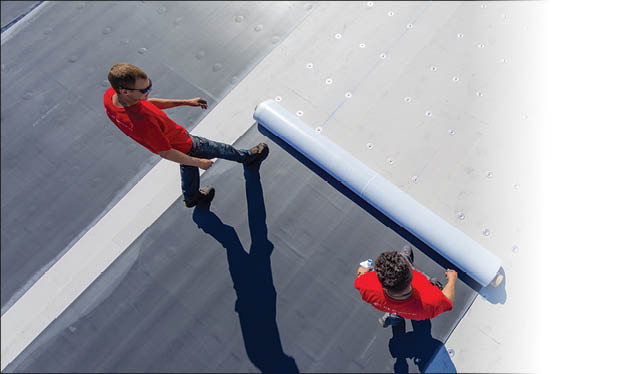
Release: The third step is to remove the split-release liner. Two workers, one on each side of the sheet, should simultaneously remove the split-release liner toward the edges of the membrane at a 45-degree angle. Once the removed portions of the liner extend past the edges of the membrane, the workers should roll back the folded back portion of the membrane on to the substrate. They should continue to remove the liner along the entire length of the sheet, move at a continuous pace, pull at a 45-degree angle and keep the release liner low against the membrane surface. Once they remove the liner, they should broom the membrane to initiate adhesion. Brooming should start in the middle of the membrane and move toward one edge, back to the center and then toward the other edge. At roof edges, three crew members may be needed to remove the split-release liner and selvedge edge liner simultaneously. This process reduces the risk of trapping air bubbles or causing wrinkles. If there are wrinkles during the application, workers should relax the sheet and carefully remove the release to mitigate further wrinkles. Small wrinkles usually can be rolled out with a silicone roller; larger wrinkles that may create a tripping hazard or prevent water flow should be cut out and repaired with a cover strip.
Roll: Finally, roll the membrane using a weighted roller. Rolling the membrane helps release any air pockets and ensures the adhesive fully bonds with the substrate. However, depending on the substrate, a weighted roller may damage the factory-applied adhesive. Consult the manufacturer’s installation instructions for specific requirements.
Crew size
Self-adhering EPDM membranes offer a solution for projects with labor constraints. Compared with other roof systems, self-adhering EPDM membranes may require less labor because there is no need for membrane adhesive or welding seams. This streamlined installation process can allow for faster completion and less disruption to building operations and occupants.
Depending on the project, three to four crew members may be enough to install a self-adhering EPDM roof system. If you have a small project or a roof that is difficult to access, talk to the membrane manufacturer or an authorized representative about the availability of self- adhering EPDM membrane in lengths less than 100 feet .
Slope
Self-adhering EPDM membranes are an ideal choice for slopes less than 2:12. For steeper slopes, it may be more appropriate to use conventionally adhered systems that require the separate step of applying the membrane adhesive in the field.
Material usage
Careful material layout and planning are essential for reducing waste and maximizing coverage area per roll. Consider flashing rooftop penetrations such as mechanical equipment, skylights or vents with pre-molded flashing materials that offer faster installation and superior performance compared with field-fabricated flashings. Taking accurate measurements, making precise cuts and employing efficient material handling practices all contribute to cost savings without compromising quality.
Regarding seams, workers should approach side laps differently than end laps. For side laps, they should use seam tape for added security, apply the tape to the overlap area and roll thoroughly to ensure proper adhesion.
For end laps, workers should install a batten cover over the end laps to secure them and provide additional protection against water infiltration, wind uplift and other environmental conditions. Because there is no selvage edge for seam tape in end laps, cover tape is needed to properly seal the seams. Cover tapes have different adhesive properties to effectively bond surfaces that do not have a specialized edge for seaming.
Finally, a patch or cover is best for T-joints. T-joints are particularly vulnerable points where side and end laps intersect, creating a T shape. These intersections can be challenging to seal properly and are prone to leaks if not adequately addressed. Workers should clean and prime the intersection where the side and end laps meet, then carefully align and adhere the T-joint cover over the area using a seam roller to ensure a firm, air-free bond. I recommend performing a final inspection to verify a watertight, durable seal.
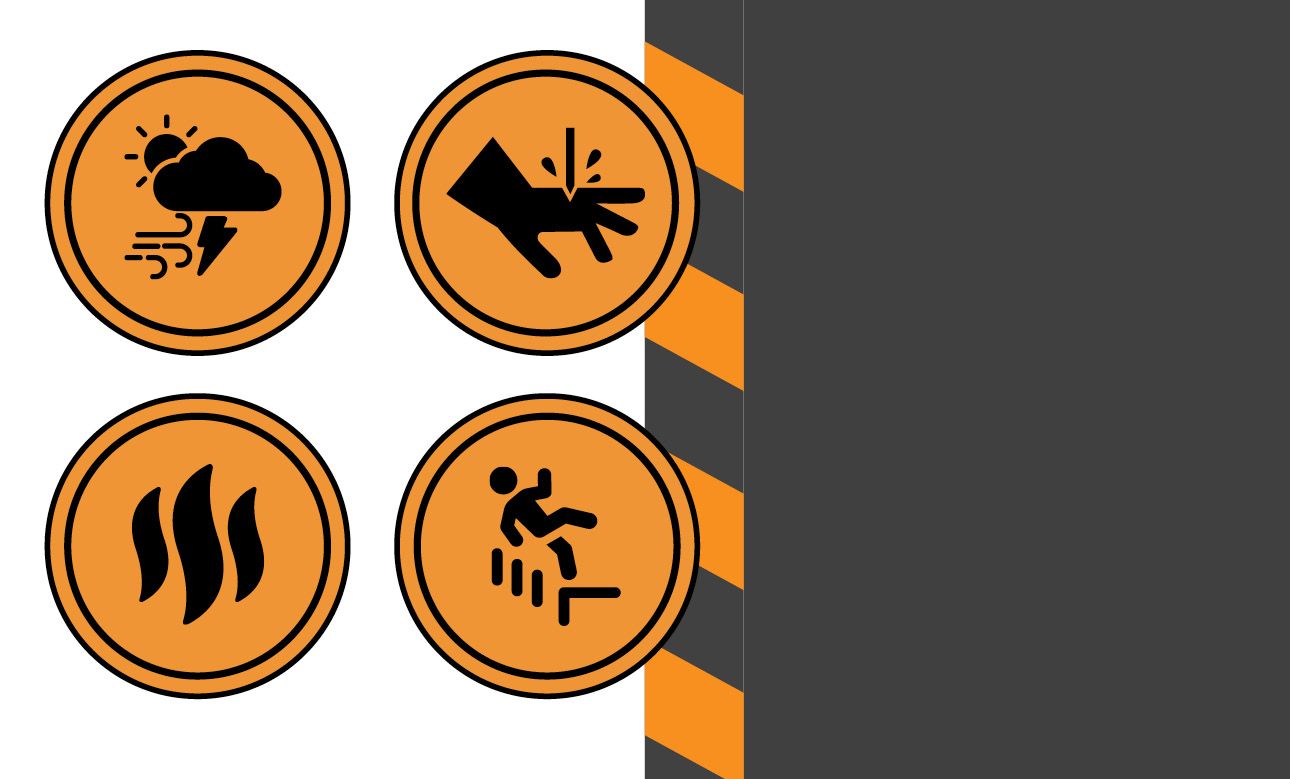
Safety
No matter how experienced your workers are, keep safety at the forefront on every project. Be sure to follow Occupational Safety and Health Administration guidelines and industry best practices and implement a training program to ensure secure, incident-free job sites. Proper safety protocol includes using personal protective equipment, installing perimeter warning flags, providing reflective gear to enhance worker visibility, providing water for hydration and planning work hours to maximize productivity with the least risk to crews.
Note some of the steps in a self-adhering EPDM roof system installation can generate static electricity, particularly in dry working conditions. To avoid igniting flammable vapors, keep adhesives, primers and cleaners out of direct sunlight and away from the immediate work area when not in use and tell workers to discharge built-up static charge from their bodies before handling open containers. Make sure a fire extinguisher is always on hand, regularly contain and remove job-site debris and rubbish, and establish a means of egress from the roof in the event of a fire.
Potential drawbacks
Although self-adhering EPDM membranes are a versatile, smart choice for many commercial projects, there can be limitations. Self-adhering EPDM may not be suitable for all roof types, and EPDM typically is a higher priced option because it is a premium material with a longer expected lifespan.
For buildings with shorter life expectancies, the cost of a self-adhering EPDM membrane may not offer sufficient return on investment. Self-adhering EPDM membranes typically are available in 10-inch widths, which could present challenges depending on roof layout and geometry where either wider or narrower panels may be more appropriate to eliminate waste.
Other options
If cost in the short term is a priority over longevity and durability, a mechanically attached system may be more cost-effective and appropriate. Both EPDM and TPO can be mechanically attached, and mechanical attachment may be a more budget-friendly option. There is a self-adhering option for TPO, as well, which is especially valuable in areas where wind uplift is a concern.
For restaurants and industrial facilities, PVC is worth considering because of its resistance to chemicals, oils and greases. PVC roof systems also are considered more durable in areas with high foot traffic. They can be equipped with additional reinforcement for enhanced puncture resistance, making them suitable for roofs that require regular access or have heavy equipment. Additionally, PVC has strong fire-resistance properties, making it preferable in applications where fire rating is of high concern.
A good option
Following these tips for installing a self-adhering EPDM roof membrane will enable you to finish jobs in less time while ensuring a high-quality, long-term solution and more satisfied customers.
PATRICK SINCLAIR is warranty claims department manager for Holcim Building Envelope, Nashville, Tenn.